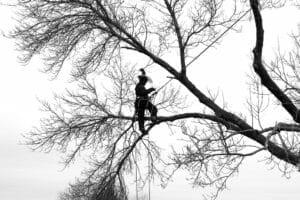
Are Your Trees Ready for Stormy Weather?

Are Your Trees Ready for Stormy Weather?

We’re heading into the season of colder, harsher weather. Are your trees ready for the coming storms? Even a seemingly harmlesStormy Weathers windy day can make a weak tree a hazard to your home and family.

Given that bare trees are easier to inspect, fall and winter are definitely good times to keep an eye on the condition of your trees. Here are some tips to keep you safe:

Remove dead limbs. The first and easiest step to take is to identify and remove dead limbs. Dead or dying limbs are susceptible to wind, and it may not take as much as you think to bring them down.

The cold and harsher weather in the fall and winter can also weaken a tree and its branches. Mulching your trees is a bit like giving them a warm blanket, as it can significantly warm the soil’s surface and protect roots from extreme temperatures.

Watch for leaning trees. Even without the threat of high winds, if you have a tree with limbs leaning on or towards your home or areas in the yard where you and your family congregate, they are a hazard that needs to be addressed. If you are unsure about how strong your tree is, we can help you determine what, if anything, needs to be done.

Watch trees encroaching on power lines. Trees are involved in the vast majority of power outages here in Portland. To lower your risk for an outage, it’s important to make sure your trees stay a safe distance from power lines. It’s also important to keep trees from encroaching on your home.

Recommendations vary, but keeping limbs at least six feet from your home and power lines is a good idea. Always leave tree trimming close to power lines to the professionals, but don’t procrastinate, as it can lead to power outages, surges and even fires.

During a storm or severe weather, fallen trees or branches can pose a significant risk to power lines, leading to power outages and other hazards. If you notice a fallen tree or branch on a wire, it’s important to take appropriate measures immediately. This includes calling your electric company as well as a qualified arborist, who can assess the situation and determine the best course of action.

At Urban Forest Pro, we have extensive experience in safely removing fallen branches and trees from a variety of precarious situations, including tree trimming around power lines. We’re here to help you navigate any emergency situation and provide expert guidance on how to keep your trees and property safe.

This post first appeared on https://www.urbanforestprofessionals.com

How to Plant a Tree Like a Pro in the Pacific Northwest

Planting a tree is always an exciting new undertaking, but it takes plenty of work to ensure your trees long term health and success. A long and happy life for you tree means proper planning starting with the time of year you plant your tree to care of your tree after planting.  Here’s exactly how to plant your tree like a pro.

What time of year should I plant my new tree?

There is some debate on the ideal time for planting that new tree. However, contrary to popular belief that spring is the ideal time, you should really look to do it in the fall.Autumn leaves

New trees have the best chance of survival when exposed to moderate temperatures and a good amount of rain. Our falls are cool and definitely come with plenty of rain, which creates the ideal weather for planting a new tree.

The condition of the soil is better as well, with the soil being warm enough and not quite as damp as springtime, after it’s endured many months of rainfall.

A new tree needs to have time to develop a system of roots and acclimate itself before the intense weather of winter unfolds, so planting it as early as possible in fall is important. Because the root system will already be grown and in place, the warmer months will be easier on the tree. Some trees have a harder time making it through winter than others, so while fall is the ideal time for tree planting, some precautions still must be taken to make sure your tree stays healthy. We highly encourage you to contact our team of arborists with any questions you may have.

Evergreens are particularly at risk during winter due to their leaves losing more water than other types of trees. With all types of trees, especially evergreens, consistent watering is of the utmost importance. Water your new trees with an inch of water each week, even after the leaves start falling off the trees. You want to continue watering during breaks in rainy weather to give the tree as good of a chance as possible of getting through the winter.

How to Choose the Perfect Tree

Certified Arborist planting treesChoosing the right tree for the right area of your yard is the most difficult and time consuming part of planting a tree. You need to do your research. In some cases it may not be best to handle this step yourself. You need to consider: Light availability, mature size, growth rate, drainage, disease concerns, maintenance costs, clean up, city restrictions and of course aesthetics. You should try to avoid planting anything other than ornamental trees within 10’ of your home.

Probe your local nursery staff of information about tree you are considering. It also might be a good idea to have an arborist out for recommendation on what tree might work well in your space. An arborist will know the most about the characteristic or different trees and their maintenance and disease concerns specific to your location. Most arborists provide this service for a small fee ($50-$100). Spending a little money of this now could really save you in the long run if you plan to stay in the house.

Purchasing a Healthy Specimen

When purchasing a tree it’s important to choose a healthy tree with good structure. It amazes me sometimes how many trees that should be in the burn pile end up for sale at retail nurseries. Here is a list of things to look for:

  • Unless your tree is a multi-stemmed your tree should have a single trunk that leads straightthe middle of the tree to the top of the tree. It is important that this single trunk be intact all the way to the tip top of the tree.
  •  Your tree should not have any scars or damage to the trunk.
  •  Your tree should not have any indication of bugs or other infestations.
  •  Look at the roots of the tree. The larger roots should not swirl around the container. This is a sign the tree has been in that size pot too long. Also they should appear healthy will no signs of rot. This will require you get your hands dirty.
  •  Stand back take a look at the tree from far away. Ask yourself: Is the tree appealing in its shape? Are the branches evenly spaced? Is the shape consistent with the variety? This is a lot easier to do when the leaves are off the tree, but work with your situation the best you can.
  • Choose a larger tree. If you are looking at a stock of trees and there are several that all seem like they are in good condition choose the large one. Large trees handle the stress of transplant better and root in more quickly. They are also less prone to damage and vandalism. We recommend a 2” caliper tree in most situations.

It is a good idea even if you are having your tree delivered to go to the nursery and pick it out by hand as it most likely will be a permanent part of your landscaping.

Planting Your New Tree

Now for the fun part: you’ve found the perfect tree, you just need to get it into the ground. Take the tree out of the container and score the sides of the root wad cutting trough the outer layer of roots 1-2” with the side of your shovel. Do the same thing to the bottom of the root wad in an X pattern. Dig your fingers into the root wade and loosen the outer layer of roots.Planting a new tree

Measure the height from the bottom of the root wad to the top of the soil. Dig a whole this deep and twice as wide as the container the tree came in. You do not want to put more than a dusting of new soil over the top of the root wad. Any deeper can cause rot at the base of the tree. A wide hole helps the roots get established in less compacted soil.

If your soil is clay you will want to make the hole narrower to stop water from collecting at the bottom of the hole (a couple of inches wider than the container). Also if the tree is in a high traffic area you may want to make the hole narrower so the tree can stand up on its own without being staked.

Staking creates a long list of problems for developing trees. A tree should be able to hold itself up. While a wider hole is preferred you will need to do what is needed for your specific circumstances.

Put the tree in the hole lightly compact the soil around the tree. Do Not amend the soil. If you are adding soil, mix your own soil with regular top soil. Amended soil can cause the roots to want to stay in the nutrient rich area instead of rooting out and stabilizing the tree. Also if you had a tree removed do not plant the tree in the stump grindings. You will have to remove the stumps grinds and replace that soil with top soil.

I personally like to create a little raised ring around the tree at the outer edges of the disturbed area. What this does is stop water from running over the ground and away from the roots and traps it so it leaches into the soil and down to the roots. Remove all tags, tape, bracing, and any other stuff that is not a natural part of the tree. Ta da! Congratulations, you’ve planted a beautiful new tree. To find out exactly how to care for that tree, check out our blog post here.

Tree Planting Experts in Portland, Oregon

Top of tree Planting a tree is an exciting project to take on. Knowing proper tree care will make the planting process go smoother. Whether you have experience planting trees or have none at all, a licensed tree professional is the ideal choice to ensure your new sapling’s health and survival for many years to come, and at Urban Forest Pro, we have the expert team to help you do just that.

Check out what Caleb had to say about us on Google:

“They were on time, friendly, did a great job, and even did a little bit more than we originally had quoted. Would definitely recommend!”

⭐⭐⭐⭐⭐
5/5

(July 15, 2020)

This post first appeared on https://www.urbanforestprofessionals.com

Tree Removal Permits Portland

2e1ax_simplistic_frontpage_blog-permitsThere are a lot of things that can trigger the need for a tree removal permit in city if Portland. That is why it is important to do your homework before proceeding with any tree removals on your property. Even if the trees are in your back yard and you are on a single family lot the city still may have a say in what you do with your trees.

What Trees are Covered:

All street trees need a Portland tree removal permit to be removed and must be in bad shape for the city to even consider it. Just because the tree is not in-between the sidewalk and the street does not mean it is not a street tree. You must look up your right of away boundaries to be certain.  In addition, most trees (with some exceptions) on dividable lot, lots under development or with building permits issued, corner lots, commercial, or multi-family lots and also Heritage trees (which are usually marked)  require a permit for removal. The city also has specific zones with conservation rules that may affect your ability to remove or even prune your trees.

So how do you figure out whether you need a tree removal permit or not. My recommendation is you don’t. The rules are complex and different rules are covered by different city agencies. I recommend home owners thinking about removing a tree either contract with their tree service to research and obtain the permit or that they call the Urban Forestry department at the city of Portland who can provide them with a definitive answer or point them to the correct agency to inquire with. If you do contract with your tree service to obtain permits make sure it is part of your written contract because most tree services only provide this service at the request of client. You should never assume they are getting the permits unless they say that they are on the contract.

urban forest button contact us tree work

Timeline

The city is notoriously slow in responding to tree removal permits, we recommend home owner to expect a 4-8 weeks for an answer. Even a call back from their office takes a couple of days. This is one of the ways we can help out a lot. When your tree service sends a permit in they know what the city would like to see and so you won’t wait 8 weeks just to hear your permit is incomplete. Also it helps to have arboricultural terms used in the reason you would like your tree removed. If you write “too many leaves on my driveway” the city could really care less about your driveway or that the trees are lifting your sidewalks. They are tasked with the preservation of the urban forest and they are focused primarily on that goal.

Fees and Fines

Most Portland tree removal permitting fees in the city remain a very good value at $35 a pop. This has to be less then it costs the city to send someone out to look at your tree. Fines on the other hand can be quite punitive. They start at about $1,000 per tree for removals without a permit and go up into and the sky is the limit. I have heard of fines in the 20,000 range. The Urban Forestry department does not mess around and even in the event of a “I didn’t know any better situation” they usually want more and larger trees planted then would have been required by the permit and a $1,000 fine. The responsibility for the planting and fines will either lie with the tree service or the home owner or most likely both depending on the specific circumstances.

I am sure most of you are disappointed in reading this article that you still don’t know if you need a permit to remove your tree.  I wish it were a simple task that I could explain in a short blog post but unfortunately it is not and that is what we are here for. We can help!

urban forest button contact us tree work

Permit Questions for Urban Forest Pro: 503-226-7143 or [email protected]

City if Portland Urban Forestry: 503-823-4489  or    [email protected]

Disclaimer: this blog post is accurate as of the date posted and changes to permitting rules may not be immediately updated.

This post first appeared on https://www.urbanforestprofessionals.com

How to Identify Heat Stress in Trees

b2ap3_thumbnail_Trees-heat-stressMost people are able to recognize the signs of heat stress in people and animals, but heat stress in trees is less recognizable and just as dangerous. Homeowners who live in hot, dry climates should pay special attention to their trees during the summer, especially during the months of July and August. But it can also be an issue for those of us who live in areas where the hot season is shorter.

Treating heat stress as soon as you recognize the signs goes a long way toward keeping your yard healthy and strong.

What Causes Heat Stress?

All plants rely on a regular supply of water to keep them healthy and cool. The water is usually absorbed through the roots of each tree and it travels all the way through the plant until it reaches the leaves. Excess water is released through the leaves as dew. During hot weather the process of water traveling through the trees speeds up, causing the tree to absorb less water and they become dehydrated.

Heat Stress Signs

Take a close look at your trees to see if they are becoming stressed by the heat. The first sign of dehydration you are likely to notice is a generally dried out look to the leaves. Some trees have leaves that droop and feel crisp on the edges. The leaves may also turn yellow. Trees that usually have blooms on them will stop blooming if they become dehydrated, and fruit will drop off the tree before it’s ready. Smaller trees, or those without blooms, may look like they are wilting.

How To Combat Heat Stress

Watering your trees as deeply as possible is an important way to fight heat stress. Some homeowners water their trees on a schedule so they don’t forget when it’s time to do it.

It’s best to water each trees deeply to allow the roots to absorb and hold water. Many homeowners bury a drip hose underneath mulch around their trees so they can just turn on the hose when the trees need water. The use of a timer makes it so your don’t even need to remember to turn on the hose.

Another good option to place a bucket next to the tree place a small hole in the bottom fill up the bucket. The small hole allows the water to seep out slowly and absorb deeper into the soil and thus down into the root zone of the tree. Watch your trees and adjust your watering schedule according to how your trees are reacting to the water. Overwatering can be detrimental to trees as well, so try to strike a balance that keeps your trees healthy.

Check out what Ed had to say about us on Google:

“The three person crew from a Urban Forest Pros showed up on time and immediately got to work. I was really impressed with their professionalism and especially the care/respect they showed for my property. They did a thorough and complete job off pruning my oak tree and left the job site totally cleared of debris. I highly recommend this company for all of your tree care needs.”

⭐⭐⭐⭐⭐
5/5

(Aug 26, 2020)

This post first appeared on https://www.urbanforestprofessionals.com

An Introduction to Tree Cabling

2e1ax_simplistic_frontpage_blogpicfWhat it is?

Tree cabling is a lesser-known preservation technique, utilized by professional Arborists to provide support to trees that may be prone or at risk of failure. There are a number of different support systems for tree care applications, but tree cabling is the most common and widely used within the tree care industry. Cable systems are either static (steel) or dynamic (rope) systems that are installed in the upper canopy to add support and reduce risk. A professional Arborist evaluation and recommendation is the best way to determine what your tree needs for overall health and longevity.

What it does

A tree support system’s main purpose is to provide additional support or limit movement of a tree or tree part. They do not provide primary support to a tree. Typically, a cable system is used to support weak unions and long heavy limbs. Often times, limbs or trees are cabled to reduce the risk posed to people or property. A tree cable system can be arranged in various configurations to best suit the trees support needs. They act as an extra measure of safety to preserve and maintain trees in our urban environment but not a guarantee of safety.

Types

There are two types of cable systems: static and dynamic. Static systems are composed of steel cable and hardware. Dynamic systems are composed of non-invasive, rope-like materials. Steel (static) systems were traditionally used, before the introduction of dynamic systems. Steel cable is often times used in very failure-prone applications where system longevity and strength are necessary. Dynamic systems also provide great, high strength support and risk reduction in trees. The science behind dynamic systems is to allow for more natural movement in the tree, while providing enough support in the canopy to reduce the risk of failure. Again, an Arborist can best determine what type of system should be used, depending on the trees needs and risk.

 After care

Tree cable systems need to be periodically inspected by an Arborist. Scheduling inspections and follow-up maintenance on tree cables is important. Regular maintenance to a tree cabling system will help maintain its effectiveness and durability. Tree cable systems are designed to be a long-term benefit to the tree’s health. The length of time between maintenance should be determined by your arborist, but should not normally be any longer than 5 years.

Check out what Jasun had to say about us on Google:

“Superb customer service throughout the process. From the free initial consultation, to scheduling, to the day of. Dalton and Shaden did a fantastic job pruning and cabling my sugar pine that was split at the base. Super friendly and explained all the work being done. I would highly recommend.”

⭐⭐⭐⭐⭐
5/5

(Sept 26, 2020)

This post first appeared on https://www.urbanforestprofessionals.com

Summer Tree Care in Portland

summer-tree-care-portland

As wet as our weather is in the winter months, it can be just as dry in the summer. With that in mind, it’s definitely not the best time to plant new trees. But for those you already have, you need to know how to care for them in the warmer and drier months of June through September.

July and August routinely see less than an inch of rain each month. It’s important that you give your trees ample amounts of water to make up for the lack of rainfall, particularly for young trees (in their first three years). If you aren’t frequently watering your trees, they become stressed, which brings about the risk for insects and diseases, improper root growth and overall stunting the tree’s growth.

It’s not enough to simply water them, though. Don’t rush it by dumping all the water once. It’s important that the water runs deep to avoid the aforementioned health problems. So when you see water pooling, stop and give it time to soak through the soil, then continue.

New trees need about 5-10 gallons of water a few times a week in the summer. Mature trees need about 1 gallon of water per inch of trunk diameter on the hottest days of summer, including 90 plus degree weather or exceptionally long periods of dry weather. The precise needs depend on how dry the weather is, the tree’s species, and size.

If you use a hose, water your trees with low-to-medium pressure to ensure optimal absorption. Since you aren’t dumping actual gallons of water, you will want to get a fairly accurate estimate of how much is coming from your hose. The best solution is to test it yourself by filling a gallon container and time how long it takes. Use that time to gauge how long you need to water your tree. Another solution is to use a five gallon bucket with a pen sized hole in the bottom

Some other quick tree watering tips:

  • Pay close attention to trees near pavement, since they are apt to be exposed to more heat.
  • Use organic mulch. This helps conserve soil moisture and temperature. Figure about 2 to 4 inches of mulch will do the trick.
  • During extreme droughts and mandatory water restrictions, give your trees priority over the lawn, since grass is easier to restore and trees take years to achieve their current state.
  • Avoid using fertilizers around trees during dry months and be very cautious about the use of pesticides.
  • Understand that just because you have irrigation watering your lawn that water may not be making it down to the tree root zone.

And for more tips and tricks about how you can care for your trees year-round see our seasonal tree maintenance plan.

This post first appeared on https://www.urbanforestprofessionals.com

6 Common Pruning Mistakes

tree pruning

Pruning, when done correctly, should result in safe, healthy and beautiful trees. DIY tree pruning seems like a simple enough idea, however, there is more to it than simply dusting off your old garden tools and hatcheting away. A certified arborist is trained to understand when a tree needs to be pruned and why, but also skilled in proper pruning techniques.

If you’re unsure what you are doing, it’s always best to avoid potential costly follies and contact us with any questions you may have.

For those who decide to prune without proper knowledge and preparation, here are some of the more common mistakes they make:

1. Using dull tools – Maybe you’ve never done much, if any, tree pruning before and the tools you have in your shed or garage have seen better days. Old overused tools may be dull, which makes the healing process longer since branches are not cleanly cut. Besides, it makes your job more physically challenging. Sharpen your tools or look into investing in new ones.

2. Not sanitizing tools – You wouldn’t want a doctor performing surgery with unsanitized surgical instruments, right? That analogy is not as crazy as you may think. After all, you are performing a kind of surgery on a living thing, and if you are doing it without cleaning your tools, you may transfer soil-borne diseases from the previous plants they were used on.

3. Topping or lopping – Thinking it’s okay to cut branches anywhere to achieve the desired effect – maybe they are encroaching on your home – is probably the most common misconception about caring for trees. Giving your tree a “crew cut” or “topping” is also referred to as “lopping.”

Simply put, lopping is the act of cutting a branch in spots other than a union or node. This creates a less attractive growth pattern, but more importantly, weakens the new branch structure. It can also make your tree more susceptible to fungal infections. You could be creating health issues for your tree, but also a hazard for you and your family.

4. Over lifting – Also called lion tailing, this is when a person removes all the lower branches of a tree, making it top heavy and more susceptible to branch failure.

5. Over pruning – Don’t get carried away when pruning a tree. You should never remove more than 25 percent of its leaf-bearing crown, even less when you are dealing with a mature tree. The surgery analogy applies here as well. Just as it takes an older person longer to heal from a surgical procedure, the same holds true for trees healing after pruning.

6. Flush cutting – This is when someone cuts a branch flush against the trunk or a main branch. It can cause a number of problems, including uneven bark and the potential for disease, fungus and pests.

While you may be well-intentioned, pruning your trees without fully understanding the proper means of doing so may not only compromise your tree’s health, but create future safety risks. Call us today and we’ll be happy to ensure you have a safe and healthy tree for many years to come.

This post first appeared on https://www.urbanforestprofessionals.com

Having Tree Work Done: How to Prepare & What to Expect

Preparing:

Parking:  Reserving parking is the responsibility of the client unless otherwise stated in your estimate the crew will need about 3 regular parking spaces in front of the your property for their truck and chipper and will need any trees to be worked on to be free of cars beneath them.  If work is being done in the backyard you will also need to move your cars from the driveway as debris can damage them on the way out to the truck.

Personal Property: Any pots, outdoor furniture, or other personnel items that can be damaged must be moved from the area in Residential Tree Care Serviceswhich the work will take place. If you have questions about what to move please call us, as the crew’s time removing personal items is an extra that can result in additional charges.

Dog Poo: Your yard must be free of dog poo when the crew arrives as they will be running ropes and rigging gear on the ground and when those items are contaminated it can cause delays and in extreme cases even cancellations of  work. The crew is willing to pick up one or two piles you may have missed but anything in excess of that is your responsibility.

Internet Access: When having tree a removed there can sometimes be interruptions to your internet, cable TV service, or land line phone service. Most of the time you can call your cable company and have service restored right after the tree work is completed or the next day, but if you have the need for uninterrupted cable/internet service we can provide a temporary fix to allow you to have service until your cable company can come out. This extra is provided free as long as you return our cable line either by dropping it off or mailing it in, otherwise the cost is $40.

What to Expect:

Arrival: If your tree work is scheduled as a morning arrival the crew will arrive between 8:30-9:30am, if you are scheduled for any other arrival time the crew can arrive up to 3 hours before or after your scheduled time of arrival. If you would like a more exact ETA you can call the office within an hour of the scheduled arrival and we will do our best to provide an update. If you have special concerns such as you are leaving work at noon and the crew should not arrive before then or you are taking a day off of work to be there when the work is done you should share these with your project manager as the schedule can change due to many circumstances and the more he/she knows the better they can accommodate your situation.

Timing of Different Services: Not all of our services are done by the same crew. For example if you are having a tree removed a crew will come to remove the tree, another crew will come to remove the firewood, yet another to grind the stump, and another to plant a new tree. These services will be preformed over a period of several days (2-5 days). If you have specific deadline that you need to meet in your scheduling please share that information with your project manager. We are required by call before you dig laws to wait 48 hours after a tree removal before stump grinding unless other arrangements are made ahead of time.

Being Home: It is not necessary for you to be home when your tree work is being done.  One way to significantly reduce the cost of getting tree work done is to be able to work while it is being done and to trust it will be done right in your absence.  But if you have very specific ideas about how far a certain tree should be lifted or how far back you want some tree pruned or other items like that where the work may require your personal insight it is better if you are home in those cases.

Debris Left behind:

  1. Leaves: If you are having tree work done in the fall and you would like us to clean up leaves and other debris already on the ground we charge an extra fee for that called a Fall Clean up.
  2. Firewood: If you plan to keep the wood off of your project be aware that wood is left where it lays in 16”-18” lengths. If you need another length or the wood moved and staked you will need to have your estimator add that to your project as changes after the fact can result in additional charges.
  3. Stump Grindings: When having a stump ground a mound of wood shavings mixed with dirt will be left behind. If you are having a large stump removed it can be a large mound. These grindings need to be removed prior to planting in that area or to decompose for at least one rainy season, either way there will be excess material that needs to be moved. The grindings make great mulch in your planting beds. Also, we can remove those grindings for you for an additional fee at your request.

Completed Work: When the work is complete your yard should just as good as or better than before we came if it is anything other than that or you are anything other than 100% satisfied please give us a call we would like nothing more than to make it right. If you have any questions about the work that was done an arborist in our office can answer those for you at your request.  Also if you have any feedback at all about how your service was delivered that could help us do a better job we would love to know about it.

Check out what Dylan had to say about us on Google:

“I really enjoyed our recent experience with Urban Forest Pro. Their team showed up on time, communicated effectively, performed the work safely and cleaned up when they were done. Hard to ask for more in the contracting business. I would highly recommend them.”

⭐⭐⭐⭐⭐
5/5

(May 6, 2020)

This post first appeared on https://www.urbanforestprofessionals.com

Spring Tree Fertilization The What, When, Where, and Why

Spring tree fertilization is common as most trees have their greatest need for nutrients in the spring. In Portland this spring application usually happens in March or April as, rainy, cold weather wanes and sunny weather begins to show its face.

Trees in the city need fertilization because many of the natural processes that take place to add nutrients to the soil are disrupted. Trees in the Spring

Leaves and other debris are cleaned up before they can be reincorporated into the soil. Soil is often compacted so many nutrients are washed away as urban runoff. Also, the presence of pollutants can strip nutrients from the soil or disrupt their absorption.

If your tree is having health issues, fertilization is likely an important part of getting that tree back into tip top shape, but you need to be sure that the problem that caused the tree to be unhealthy has been resolved. A Certified Arborist can help you identify and diagnose health issues. Trees are similar to humans in that when we are sick good nutrition can go a long way to getting us back on our feet, but in some cases additional medicine or other interventions are required to achieve and maintain our health.

In our practice, we utilize 2 basic types of fertilizers:

  1. Chemical: This is your basic man-made chemical fertilizer. There are several reputable brands which have developed formulations made specifically for either Deciduous or Evergreen trees, and for application in either the spring or the fall. Two of the most popular brands are Jobes and Phc for trees. Jobes is a good quality one that has an organic option and is available at most Home Depot stores. Phc is a little harder to find but has excellent proven results and is what many professional arborists use.
  2. Natural Mix: For us this is a compost tea mixed with Mycorrhizal Fungi. This fertilizer combination is a more organic option that mimics nature. The Mycorrhizal Fungi helps with the absorption of the nutrients and, we have seen great results with their use of urban trees. This application is somewhat custom and cannot be bought off of the shelf.

Fertilization options for trees also come is several application options. Fertilizer in most cases can’t be just spread on the ground surrounding the tree. It needs to be inserted under the soil 6”-12” down into the root zone of the tree. Those application options are:

  1. Tree Spikes: These are the most common option for a DIY fertilizer application. Tree spikes are soil form fertilizer which is formed in a spike shape which can be driven into the ground by hand (of at least in theory they can).
  2. Deep Root Fertilization: This is a liquid fertilizer pumped into the soil using a long wand attached to a commercial pump. This method is favored by professional arborists.
  3. Injections: Fertilizer applications can be injected directly into the tree, but this is usually only done in extreme cases or when the tree is also receiving another type of injection.

When is come to fertilizing your tree there are many options for both the do-it-yourselfers and the folks in need of a little more professionals intervention. If you do fertilize your tree yourself be sure to read and follow the manufactures instructions. This is only a primer on the vast topic of trees and fertilization so achieving success in your project will likely require some additional research.Feeling a little overwhelmed don’t worry our certified arborist would be happy to help.

What Our Clients Say About Us

“They were on time, friendly, did a great job, and even did a little bit more than we originally had quoted. Would definitely recommend!”

Caleb I.
Rating 5/5 ⭐⭐⭐⭐⭐
See our 4.8 rating and read more of our 196 reviews on Google!

This post first appeared on https://www.urbanforestprofessionals.com

How to Plant a Tree Like a Pro

thumb_tree planting portlandBelow are step by step instructions on how to plant a tree like a pro and ensure that your tree gets off to a good start.

1. Choosing the Right Timing: The best time to plant a tree in Portland is from when the rain starts to a month before it stops and not during any cold snaps. More or less this is from October 15 to April 15th. If you need to plant a tree outside of this season that is ok, just realize that the tree will need regular watering until the rains begin again and try to avoid any particularly hot weather.

2. Choosing a Tree: choosing the right tree for the right area of your yard is the most difficult and time consuming part of planting a tree. You need to do your research. In some cases it may not be best to handle this step yourself. You need to consider: Light availability, mature size, growth rate, drainage, disease concerns, maintenance costs, clean up, city restrictions and of course aesthetics. You should try to avoid planting anything other than ornamental trees within 10’ of your home.

Probe your local nursery staff of information about tree you are considering. It also might be a good idea to have an arborist out for recommendation on what tree might work well in your space. An arborist will know the most about the characteristic or different trees and their maintenance and disease concerns specific to your location. Most arborists provide this service for a small fee ($50-$100). Spending a little money of this now could really save you in the long run if you plan to stay in the house.

3. Purchasing A Healthy Specimen: When purchasing a tree it is important to choose a healthy tree with good structure. It amazes me sometimes how many trees that should be in the burn pile end up for sale at retail nurseries. Here is a list of things to look for:

1. Unless your tree is a multi-stemmed your tree should have a single trunk that leads straightthe middle of the tree to the top of the tree. It is important that this single trunk be intact all the way to the tip top of the tree.
2. Your tree should not have any scars or damage to the trunk.
3. Your tree should not have any indication of bugs or other infestations.
4. Look at the roots of the tree. The larger roots should not swirl around the container. This is a sign the tree has been in that size pot too long. Also they should appear healthy will no signs of rot. This will require you get your hands dirty.
5. Stand back take a look at the tree from far away. Ask yourself: Is the tree appealing in its shape? Are the branches evenly spaced? Is the shape consistent with the variety? This is a lot easier to do when the leaves are off the tree, but work with your situation the best you can.
6. Choose a larger tree. If you are looking at a stock of trees and there are several that all seem like they are in good condition choose the large one. Large trees handle the stress of transplant better and root in more quickly. They are also lest prone to damage and vandalism. We recommend a 2” caliper tree in most situations.

It is a good idea even if you are having your tree delivered to go to the nursery and pick it out by hand as it most likely will be a permanent part of your landscaping.

4. Plating the Tree: Take the tree out of the container and score the sides of the root wad cutting trough the outer layer of roots 1-2” with the side of your shovel. Do the same thing to the bottom of the root wad in an X pattern. Dig your fingers into the root wade and loosen the outer layer of roots.

Measure the height from the bottom of the root wad to the top of the soil. Dig a whole this deep and twice as wide as the container the tree came in. You do not want to put more than a dusting of new soil over the top of the root wad. Any deeper can cause rot at the base of the tree. A wide hole helps the roots get established in less compacted soil. If your soil is clay you will want to make the hole narrower to stop water from collecting at the bottom of the hole (a couple of inches wider than the container). Also if the tree is in a high traffic area you may want to make the hole narrower so the tree can stand up on its own without being staked. Staking creates a long list of problems for developing trees. A tree should be able to hold itself up. While a wider hole is preferred you will need to do what is needed for your specific circumstances.

Put the tree in the hole lightly compact the soil around the tree. Do Not amend the soil. If you are adding soil, mix your own soil with regular top soil. Amended soil can cause the roots to want to stay in the nutrient rich area instead of rooting out and stabilizing the tree. Also if you had a tree removed do not plant the tree in the stump grindings. You will have to remove the stumps grinds and replace that soil with top soil.

I personally like to create a little raised ring around the tree at the outer edges of the disturbed area. What this does is stop water from running over the ground and away from the roots and traps it so it leaches into the soil and down to the roots.

Remove all tags, tape, bracing, and any other stuff that is not a natural part of the tree and enjoy your new tree.

Looking for professional tree planting services near you? Contact our team of ISA-certified arborists who are here to assist you every step of the way.

A blog post on tree planting after care instructions coming soon.

This post first appeared on https://www.urbanforestprofessionals.com

This website nor its owners are an actual service provider, this website is a referral service. When you place a phone call from this website, it will route you to a licensed, professional service provider that serves your area. For more information refer to our terms of service.

© TreeRemovalandTrimming.com

(877) 959-3534