Spring is here, and many people are thinking about tree planting, whether to add more shade or to replace trees that have been removed. As Portland certified arborists, we consistently field homeowners’ questions about replanting options. After arranging our Portland tree removal services for a tree lost to winter storm damage or disease, our customers often hope to replant another tree in the same spot. However, replanting is not as simple as it may seem. It’s important to choose a tree that will thrive in your available space. Moreover, city law may restrict your replanting options. Read on for our tips on replanting.
 Tree planting is an area of urban arboriculture where major and costly mistakes are often made. The two major problems are 1) Choosing the wrong tree, and 2) Putting it in the wrong place. When choosing a tree, think about its preferred growing environment, its mature size, disease concerns, and other factors. If you’re unsure about whether a certain species will work, arrange for a tree consultation with one of our arborists.
Once you’ve found a species that will fit well in your available space, be picky about selecting the right specimen at the nursery. Our blog post on choosing a tree like a pro has advice on how to buy a healthy tree. Ultimately, when it comes to Portland tree planting, the ideal approach is to work with an experienced arborist who can help you select and plant the new tree.
Municipal restrictions are another area of concern when replanting trees. As the homeowner, it is up to you to be aware of local restrictions and regulations, which do vary around the Metro area. Portland, in particular, has some rather tight guidelines that could lead to a fine if not closely followed.
Portland Tree Planting Regulations
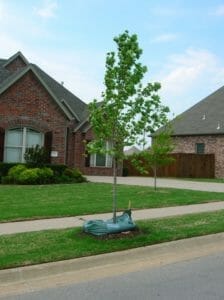
Street Tree Permits. If you intend to replant a street tree in Portland, you will need to get a permit that approves the tree type and size. To determine if a tree is considered a street tree, follow the City of Portland’s online instructions, which direct you to PortlandMaps.com to locate the tree. Basically, if more than 50% of a tree’s trunk is in the public right of way, it is considered a street tree.
Planting in your Yard. Although Portland has restrictions about what kinds of trees can be removed, the possibilities are endless as to what kinds of trees that can be planted in your yard. We recommend that you take a look around and see what you like and don’t like about the existing trees in your neighborhood. A professional arborist or horticulturalist can help you make an informed decision about what kinds of trees will grow best in your intended location.
Permits. In Portland, permits are needed for pruning, removing, and planting street trees or trees on commercial property. If you do not get a permit, you could be subject to fines of up to $1000 per tree, or $100 per inch of diameter—even if the arborist never told you that you needed a permit. At UFP our certified arborists can help you attain the necessary permits.
Mitigation. Some local municipalities, such as Lake Oswego, require that homeowners replant a new tree when an old tree is removed. This practice is referred to as mitigation, and it comes with its own set of city regulations. For example, in Lake Oswego no mitigation is required for trees that have been removed because they are hazardous or dead. Mitigation is required when a tree has been removed from a Lake Oswego right-of-way. Our Portland certified arborists can help you create a mitigation plan for tree removal.
Replanting for other reasons. The trees in our urban landscape provide both economic and environmental benefits. Mature trees add property, clean the air by producing oxygen, and provide habitat for nesting songbirds, among other benefits. The average lifespan of an urban tree is only 10 years, and most trees don’t reach maturity until 20 years, illustrating that maintenance is important to extending a tree’s lifespan. These numbers also emphasize just how much replanting actually goes on in an urban environment.
Whatever your reason for planting a new tree, we’d love to help. Our Portland tree services include consultation, tree sales and tree planting. For $300, we will take care of the whole process, from tree selection to planting. Our trees are premium stock; as such, we guarantee their health for three years against everything except vandalism and drought. Call us today about replanting a tree in your yard. If you’re wondering how much to relocate a tree check out this blog post.
This post first appeared on https://www.urbanforestprofessionals.com