Category: Uncategorized

What Causes Pine Trees to Lose Their Needles?

Have you discovered one or more pine trees shedding needles in your landscape?

Being that pine trees are evergreen – not deciduous – conventional wisdom should lead you to believe that this isn’t normal. After all, evergreens are characterized by their ability to retain leaves year-round.

So, if you discover a pile of pine needles blanketing your landscape, you may assume that one of your pine trees is sick or dying.

While this may be true, though, it’s usually just a normal phenomenon that doesn’t jeopardize the health or longevity of the affected pine tree.

Pine Trees Shed Their Needles Once Every Few Years

You might be surprised to learn that pine trees shed their needles once every few years.

There are roughly three dozen species of pine native to the United States. Some pine species shed their needles as frequently as once every two years, whereas other pine species shed their needles just once every five or six years. Regardless, all pine trees shed their needles.

Pine trees shed their needles to make room for new needles. Unbeknownst to many homeowners, pine trees grow new needles each year.

As these needles emerge, they’ll push out old needles, causing them to fall to the ground. Known as “needle drop,” it’s all part of a pine tree’s natural life cycle. If pine trees didn’t shed their old needles, they wouldn’t be able to grow new needles.

Lack of Water Can Cause Pine Trees to Shed Their Needles

Most instances of needle shedding in pine trees is a natural phenomenon, but this isn’t always the case.

If a pine tree is severely dehydrated, it may shed some or all of its needles in an attempt to survive. The fewer needles a pine tree has, the less water it needs.

Normally, you’ll discover the needles turning brown on a dehydrated pine tree first. Assuming the pine tree doesn’t get an adequate amount of water, the brown needles will die and fall off.

Fungal Disease Can Also Cause Pine Trees to Shed Their Needles

A fungal infection can cause pine trees to shed their needles as well.

Dothistroma, for example, is a fungus responsible for needle blight. When the needle blight-causing fungus infects a pine tree, the needles will die and fall off the tree.

You can usually diagnose needle blight in pine trees by looking for common symptoms like yellowing of the needles, the formation of a reddish-colored band around the needles and general discoloration of the pine tree’s foliage.

The Woodsman Company offers tree planting, tree pruning and shrub trimming, tree removal and stump grinding as well as a tree wellness program.

If we can help with any of your tree care needs give us a call at 512-846-2535 or 512-940-0799 or

Request a Quote / Schedule an Appointment

The post What Causes Pine Trees to Lose Their Needles? appeared first on Woodsman Tree Service.

How to Fix Exposed Tree Roots

Exposed tree roots damaging ladscape and hardscape features

Are ugly surface roots buckling your concrete driveway or stopping you from mowing your lawn? Before you get frustrated and cut them out, there are some things you need to know.

72tree.com gathered the following information on how to handle surface roots without compromising the health of your tree.

Why Do Tree Roots Surface

While some roots grow deep in the ground, the majority of them spread out from the trunk within the first 4 to 12 inches of soil. As the tree ages, several factors may bring them to the surface:

Erosion – Over time, the top layers of soil may be washed away, lowering the ground level, subsequently exposing tree roots.

Soil Compaction – As tree roots spread out, they seek moist aerated soil to derive water and nutrients. When they run into compacted soil, they will turn downward or upward, and in many cases will grow along or just beneath ground level.

Natural Growth – The same way a tree trunk and limbs increase their girth with age, so do roots. Since the majority of tree roots grow within the first few inches of soil, they tend to break the surface as they thicken.

Species – Some trees grow this way. Species such as maples, poplars, and willows tend to grow surface roots.

As annoying as it may be, surface roots are a common landscape problem that can cause significant and costly damage.

Surface Root Problems

When tree roots surface, there are many potential issues they bring with them. Those issues may include:

Disease, Infestation, and Rot – Surface roots are highly susceptible to being injured or damaged by landscaping equipment, foot traffic, or wildlife. Damaged surface roots are easily infected by disease, or infested by insects and can carry harmful pathogens to the trunk and branches of the tree.

Damaged Driveway or Sidewalk – As these roots thicken and surface, the ones that have grown under sidewalks, driveways, and foundations will eventually exert enough pressure to raise or break them.

Read more on how tree roots can buckle a driveway and what to do at 72tree.com/tree-roots-buckling-concrete-driveway/

Damaged Landscape Equipment – Lawnmowers and other mechanical equipment can be severely damaged when making contact with surfaced tree roots.

Abnormal Growth – Where Tree roots surface, any grass or plant life surrounding those roots may become sparse or die.

Trip Hazard – When surface roots are further exposed by erosion, they may become a severe trip hazard when navigating your landscape.

Exposed tree roots become landscape trip hazards

Surface Root Solutions

While cutting the roots away may seem to be the best alternative, it is not. Cutting away roots (like damaging them) leaves the tree highly susceptible to deadly diseases and infestation.

The following are ways to resolve surface root issues without causing severe damage to the tree:

Mulch – At the first sign of roots breaking the surface, lay down a 2 to 3-inch layer of organic mulch. Mulch will help the soil retain moisture, and over time may redirect the roots to grow downward.

Soil Replacement – In cases of erosion exposing roots, lay down a 3 to 4-inch layer of soil to replace what was eroded. To prevent further erosion, you can mulch the area around the tree, seed the new soil with grass, or lay down sod.

Plant Plants – Where erosion is not the problem, one solution may be planting the area with taller ground cover or plants that won’t need mowing. As you create this “tree root garden,” take care to avoid damaging the roots while planting.

Exposed tree roots covered and protected by mulch and plants

If you are still inclined to have the roots removed, hire an arborist to do this for you. Depending on the damage that may have already occurred, and type of roots that will be removed, it may be suggested to remove the tree.

Surface Root Prevention

Avoid the inconvenience of surface roots by taking action before they come to the surface:

Planting Location – Each tree species has a preferred type of soil, light, and nutrients for healthy growth. By planting trees in optimal conditions for their species, roots will be less likely to surface as the tree ages.

Soil – The soil type, moisture level, nutrient content, and pH level affect how tree roots grow. Deep watering, seasonal fertilizing, and annual pH level adjustments will encourage tree roots to grow deeper.

Species – As mentioned earlier, some tree species are prone to grow surface roots. When selecting trees for your landscape or yard, be sure to ask about the tree’s growth patterns, and do your research on the species needs for optimal growing conditions.

Read more about tree planting and care at 72tree.com/tree-planting-guide/

Exposed Tree Root Solutions

Don’t let gnarly surface roots discourage you from having a beautiful landscape. There are ways to incorporate them in your design without fatally wounding your tree.

In this article, you discovered why tree roots come to the surface, the problems they can cause, and measures you can take to solve and prevent them.

Your mishandling or damaging of surface roots can lead to the health decline and death of your tree. Before you cut roots away, call a professional to evaluate the situation and offer alternatives to save your landscape and your tree.

Sources:
https://extension.umd.edu/hgic/topics/surface-roots
https://www.purdue.edu/hla/sites/yardandgarden/when-tree-roots-surface/

This article was first published on: http://www.72tree.com/how-to-fix-exposed-tree-roots/

Trees and climate change

The two are synonymous: trees and the Pacific Northwest. From the coastal Cedars to the Coast Range Sitkas, and the pines east of the mountains, Oregon and Washington are home to a wide variety of evergreens and deciduous trees alike. Many trees have been in the area for hundreds of years and buoyed the region economically since the 1800s.

The growing seasons in the Pacific Northwest have contributed to the proliferation of different kinds of trees – some native and other not-so-native. However, the effects of climate change are being seen throughout the region. Increasing temperatures and droughts are beginning to alter the length of the growing season.

Unfortunately, trees haven’t been able to adapt to the new shortened growing times. These effects are being seen in trees throughout the region, although not in the way you might think. Yes, prolonged droughts can weaken trees, spreading disease and attracting boring insects. But recent studies have shown a more alarming trend.

Signs of Climate Change

In a recent study of Central European trees, it has been discovered that trees are growing bigger because of extended growing seasons. In some cases, an extra three weeks of growing means trees are growing faster. Unfortunately, the trees aren’t keeping their density and are becoming weaker.

If tree density had remained constant, that would mean more lumber for construction and carbon storage from the air. But these trees have lost up to 12% of their density according to the study, which investigated trees that had been closely monitored for more than 100 years in some cases.

So while the trees seem to be growing more, there is actually less tree there. The weaker trees aren’t able to stand up to storms as they once did, the lumber taken from these trees isn’t as strong, and they absorb carbon at less than 50% of the normal rate. While some of that may be mitigated by more trees and faster growth, the lifespan of those trees is also lessened.

Locally, trees are showing signs of climate change as well. Because of less precipitation, trees aren’t able to function as they are supposed to. The Western Red Cedar is unable to take what it needs from carbon before releasing it. Birch trees begin losing leaves sooner without being replaced and the tree begins to brown from the top down.

In both cases, boring insects are taking advantage of the weaker trees. These insects lay their eggs on the bark of the tree, and when the larvae hatch, they bore into the tree looking for nutrients. After tunneling for a year or two, they leave the tree and the process starts again.

While trees have been adversely affected by climate change, they may also be the best way to fight it, too.

What can be done?

According to a study published in the journal Science, planting a trillion trees is the cheapest and most effective climate change solution. The thought process is more trees means more carbon absorption, scrubbing emissions from the air. If this global planting initiative were instituted to tackle climate change, it could cut carbon up to 60 percent of the man-made greenhouse gas emissions from the atmosphere.

That’s a lot of trees – but there is enough room to plant these trees without disturbing existing forests or farmland. In some areas of the world, actions are being taken. Ethiopia recently planted 350 million trees to help stem the tide of climate change. But other countries, including Australia, the United States, China – three countries with enough available land to lend a hand – need to join the fight.

Of course, this is just one way to fight climate change. Using less gas, oil, and other man-made pollutants would be a huge way to lessen the amount of carbon dioxide and carbon emissions from the atmosphere, as would decreasing deforestation around the world, mostly in Brazil. It will take a truly worldwide effort to make the needed changes to help the Earth.

Want to do your part to help plant a few of those trillion in your own urban area? Contact Urban Forest Professionals. We consult with homeowners on which trees to plant and where as well as maintaining the trees you already have through trimming, pruning, and other services that will keep your trees looking great and cleaning the air we breathe.

This post first appeared on https://www.urbanforestprofessionals.com

6 Essential Late Summer Landscaping Tips

Towards the end of summer, many homeowners and property owners neglect their landscape. They assume that regular maintenance is no longer needed since the fall and winter months are right around the corner.

Unfortunately, the end result is an over-stressed landscape that’s more susceptible to cold and weather-related damage.

To prevent this from happening to your landscape, consider the six following late-summer landscaping tips.

#1) Add Mulch to Flowerbeds

Assuming you have flowerbeds in your landscape, add a layer of mulch during late summer to encourage water retention.

Even if it’s just 0.5 inches thick, a layer of organic mulch will trap moisture to protect your flowerbeds against dehydration.

#2) Fertilize Grass

Another tip to encourage a healthy landscape during the latter half of summer is to fertilize the grass.

Grass often enters a partially dormant state during the hot summer months. As a result, it needs a helping hand during the fall and winter months – something with which fertilizer can help.

#3) Kill or Remove Weeds

Don’t forget to kill or remove weeds when maintaining your lawn during the late summer months.

Weeds often emerge during the spring and summer, and if you don’t kill or remove them, they’ll likely stay throughout the rest of the year.

Therefore, you should either kill or remove all visible weeds in your landscape.

#4) Mow at a Taller Height

If you haven’t done so already, go ahead and raise the blade on your lawnmower by about 1 inch.

If you cut the grass too short, it will likely stress your landscape while contributing to brown and dead patches in the process.

Whether you use a riding lawnmower or a walk-behind lawnmower, raising the blade by 1 inch will protect your lawn from stress while encouraging healthy growth and development during the fall months.

#5) Inspect for Fungal Disease

When surveying your landscape, look for signs of fungal disease.

The presence of a white powder, for example, typically indicates fungal disease. The good news is that you can treat most common fungal diseases – but only if you spot them early.

#6) Prune Overgrown Plants and Shrubs

Finally, late summer is the perfect time to prune overgrown plants and shrubs in your landscape.

If left unchecked, plants and shrubs can quickly grow out of control. This is particularly true during the fall season when the temperature begins to drop and heat-related stress is no longer a concern.

The Woodsman Company offers tree planting, tree pruning and shrub trimming, tree removal and stump grinding as well as a tree wellness program.

If we can help with any of your tree care needs give us a call at 512-846-2535 or 512-940-0799 or

Request a Quote / Schedule an Appointment

The post 6 Essential Late Summer Landscaping Tips appeared first on Woodsman Tree Service.

Is it Better to Have My Tree Professionally Trimmed or Removed?

Tree Trimming Vs Tree Removals “Should I have my tree trimmed or removed?” is a question we often hear at Big Foot Tree Service. The average homeowner isn’t quite sure whether to have a tree trimmed, with hopes of it healing and “coming back,” versus having it removed all-together since it’s “for sure dead.” That’s why they call us at Big Foot Tree Service, as we can assess the overall health and well-being of trees. Our tree experts can tell you whether or not a tree can be “saved.”

When Trimming Feels Like the Best Option

If a tree isn’t dying or dead, then typically it should just be trimmed. By taking away dying or dead branches, it’s most likely that the tree will re-shape itself to its natural form with new growth. Trimming is also done when branches are getting in the way of nearby property structures– after all, you don’t want a branch breaking your window or scraping your siding. When a tree is dormant it’s a good time to trim it– this is usually in late autumn or during the winter. Ultimately, tree trimming helps a tree grow stronger and healthier.

When Tree Removal Feels Like the Best Option

If a tree is dying or dead then it should be removed. While there are several reasons for this, the number one reason is that a dead tree is unsightly– it ruins an otherwise attractive landscape. Also, dead trees can encroach on property structures and they can be a hazard, especially during or after storms. Tree removal costs vary– typically, the size of the tree, where it’s located, and what kind of species it is all factor into the cost of removal. For example, a very large, dead tree next to a house is going to cost more to remove than a small one in an open field.

How Big Foot Tree Service Can Help

In Morris County, New Jersey, and beyond, Big Foot Tree Service handles both tree removals and tree trimmings. Whether your tree is in Montville, East Hanover or other New Jersey communities, Big Foot Tree Service is here to help. As a family-owned business, we specialize in serving residential property owners who need quick and careful service– especially after storms come through and mess with the trees on their property. That said, if you have a dead tree on your property, be proactive and have it removed before a storm comes through and causes trouble.

Big Foot Tree Service is fully insured and puts customer’s needs as our top priority. Call 973-885-8000 for more information today!

This post first appeared on https://www.bigfoottreeservice.com

Oregon Pine Trees

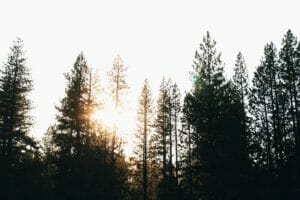
For one particular ponderosa pine in Oregon, size does matter.

Located near Grants Pass in the Rogue River-Siskiyou National Forest, “Phalanx” is the tallest known pine tree in the world, regardless of species. Measured in 2011, the tree set the mark at 268.3 feet and also has the third-biggest diameter at 17 feet, 11 inches.

About 120 miles away (as the crow flies), the worlds largest sugar pine resides, standing at 255 feet. So, for all of you young trees out there, if you want to rank amongst the worlds tallest pines, it may be time to pick up roots and move to Western Oregon.

While the Phalanx may grab the headlines, there are a great variety of pine trees growing throughout Oregon State, from the Pacific Ocean to the Rocky Mountains. However, many of these trees are generally confined to the higher elevations, anywhere from 2,300 feet to 9,000 feet above sea level.

Pine Characteristics

The bark of the pine tree can vary from tree to tree. For example, the ponderosa bark is yellow or orange and can break off in jigsaw puzzle pieces where the whitebark pine has a grayish hue. (Whitebark just sounds better than grayishbark, though). Some pines reach hundreds of feet in the air, other barely top out at 50 feet.

However, all pine trees have needles and similar fruits (pine cones). Which can cause some confusion for casual observers who may confuse fir trees with pines. Adding to the confusion is the Douglas Fir, the most populous tree in Oregon. Is it a fir? A pine? A spruce?

Although it goes by other names, such as red fir, Oregon pine, and Douglas spruce, the answers are no, no, and no. It’s actually a hemlock, and a false hemlock at that. At least, that’s what part of its genus name (Pseudotsuga menziesii) means. All three trees are the same class of conifer, though: Pinopsida.

So What Are the Differences?

Trimming Pine TreesOregon State has over 30 different conifer tree species, we’ll concentrate on the differences between firs, spruces, and pines. The first and maybe most reliable way to spot a spruce is to look at their needles. Where other conifers group their needles in two, three, or five needles, spruce needles are a singular group.

Spruce cones also differ when it comes to their cones. Pinecones are very rigid and can be prickly whereas spruce cones are more flexible. The least reliable way to pick out a spruce tree is the bark, which can differ in a variety of ways.

True firs are similar to spruces when it comes to needles, featuring single needles attached to the branch. However, where spruce tree needles are brittle to the touch, fir needles are much more pliable. The branches themselves are very dense, making them popular as Christmas trees (noble, Douglas, and grand firs being popular choices).

Fir cones are very different than the other two, growing at the top of the trees before falling apart on their way down. If a cone does make it to the ground intact, they are usually green an oozing sap. Fir bark also differs from the pine, featuring a smooth surface that may peel off. As we’ll discover below, pine tree bark is often very rough and flakes off.

Popular Pines Found in Oregon

Now that we’ve outlined the characteristics of a pine tree, let’s take a look at a few of the different varieties found in Oregon. We’ll start with the king of all pines thanks to Phalanx, the ponderosa.

PONDEROSA PINE
The needles of the ponderosa can grow up to 10 inches long and mostly occur in bundles of three. Finding bundles of two is rare, although not unheard of. The cones are oval-shaped and can reach three to five inches in length with stiff prickles that stick out for scales.

As mentioned above, the bark on older trees is yellow-orange and flakes off in odd shapes. Ponderosas can reach heights of over 200 feet (obviously), but a more common growth range is between 60 and 130 feet.

Where to find them: Ranging from the coastal range to the Rocky Mountains, ponderosas grow from sea level to an elevation of 9,000 feet.

SUGAR PINE
Coming in bundles of five, the sugar pine needs are three-sided and grow to five inches. Each side of the needle has a white line running the length of the needle. The cones are the largest featured here, sometimes reaching 20 inches in length with thick, straight scales.

The bark is reddish-brown, rutted, and breaks off in long pieces. The sugar is actually the largest of the pine trees (the Phalanx notwithstanding), with heights normally reaching anywhere from 130 to 190 feet.

Where to find them: Southern Oregon ranges at elevations ranging from 2,300 to 9,200 feet.

WESTERN WHITE PINE
Western white needles are three-sided, come in bundles of five, and grow between two and four inches long. One oddity of the needle is just two of the sides have white lines. The cones of the western white are slender, curved, and can grow to a foot long with scales the peel out at the top.

Smooth when young, the bark is segmented into squares or rectangles as they age and is very dark. These trees usually grow to 100 to 160 feet, although it’s not uncommon to reach well past 200 feet.

Where to find them: Growing from southern British Columbia to the Sierra Nevadas in Calfornia, white pines are found from sea level to 2,500 feet.

LODGEPOLE PINE
These pines feature twisted needles up to three inches long and bundled in threes. The cones are squat, two inches long, and have poky scales that flay away from the center. They may also stay closed for up to three years.

The bark is quite flaky due to its thin nature and dark in color. Lodgepole pines commonly reach heights of 70 feet.

Where to find them: Lodgepoles appear at higher elevations (around 11,500 feet) but also appear along the Pacific coast, sometimes referred to as shore pines.

JEFFREY PINE
Clustered to give the tree a bushy appearance, the Jeffrey needles come in bundles of three off the branch and can grow to 10 inches long. The cones can reach a foot in length, but after opening, the scales actually curve inward.

Similar to the ponderosa, the bark flakes of in odd shapes and sizes, but is a darker reddish-brown in color. Jeffries grow between 170 and 200 feet in height and live for 500 years.

Where to find them: In mountainous, southern regions of Oregon, anywhere from 4,800 to 9,600 feet in elevation.

LIMBER PINES
Occurring in groups of five, the limber needles can be up to three inches long and have white lines on all surfaces. The cones can remain closed for several years, reach lengths of seven inches, and have scales that are broad but not spiky.

Grayish-brown in appearance with furrows and rough to the touch, the limber pine tops out 50 feet in most cases. Along with the whitebark pine, the limber pine is one of the shortest pines in Oregon and has a shrub-like appearance.

Where to find them: Preferring dry, rocky, and higher elevations, limber pines are found in the northeastern corner of the state between 7,700 and 11,500 feet.

WHITEBARK PINE
There are white lines on the whitebark needles, which are bundled in groups of five and grow to three inches long. The cones are interesting in that even in maturity, they don’t open. They grow to around three inches in length, are relatively round, and provide a nutritious snack for woodland animals.

The bark is thin, scaly, and grayish throughout its lifespan. Usually growing to just 50 feet, whitebark pines have a similar distorted look of the limber.

Where to find them: Reach higher elevations than most other pines, whitebarks can be found near the timberline from 7,700 to 12,000 feet in the high mountains of western Oregon.

Whether you want to gaze upon a world-record holder, or need cones for a Christmas arts and crafts project, pine trees definitely offer Oregon a different texture when it comes to the canopy. They also help make up one of the best things about the Pacific Northwest: a wide variety of trees that lend shelter to animals and a beautiful landscape for humans.

This post first appeared on https://www.urbanforestprofessionals.com

How to Prevent Grass Seed From Washing Away

There’s no better way to fill bare patches in your lawn than by seeding it. Grass typically spreads on its own, but in some instances, it may require a little extra work.

If you have a bare patch in your lawn where little or no grass is growing, you should consider seeding it.

By applying the right variety of grass seed, you’ll create a more attractive and cohesive landscape.

Unfortunately, it’s not uncommon for grass seed to wash away. It takes an average of five to 30 days for grass seed to germinate.

Until this happens, the seeds will remain on the surface of the grass, which could result in them washing away during rainstorms.

As a homeowner, though, you can prevent grass seed from washing away by following a few simple steps.

Seed During Spring or Early Summer

Wait until the spring or early summer months to seed your lawn.

If you seed your lawn during fall or winter, it will take longer for the seeds to germinate. As a result, the seeds may wash away when it rains.

Assuming you’re planting a warm-weather variety of grass, you should wait until spring or early summer to seed your lawn.

Aerate Before Seeding

You can also prevent grass seed from washing away by aerating your lawn beforehand. Aeration creates small holes in the soil that will hold the seeds.

You don’t need a commercial-grade aerator. Rather, a basic walk-behind spike aerator will suffice.

Just roll the spike aerator over the surface of your lawn where you intend to plant new grass.

Apply Straw Over the Grass Seed

The most effective way to prevent grass seed from washing away is to apply straw over it.

After aerating and seeding your lawn, sprinkle a light layer of straw over it. The presence of straw will naturally protect the seeds from washing away.

At the same time, it will also protect the underlying soil from erosion, which is a common problem faced by countless homeowners.

Reseed If Needed

There’s nothing wrong with seeding your lawn two or even three times.

If the first application of seed washes away, go back and reseed it. Even if you follow these tips, some seeds may wash away – but that’s okay.

As long as you reseed your lawn, some of the seeds will make their way into your soil where they germinate to create healthy green grass.

The Woodsman Company offers tree planting, tree pruning and shrub trimming, tree removal and stump grinding as well as a tree wellness program.

If we can help with any of your tree care needs give us a call at 512-846-2535 or 512-940-0799 or

Request a Quote / Schedule an Appointment

The post How to Prevent Grass Seed From Washing Away appeared first on Woodsman Tree Service.

5 Easy Ways to Control Thistle in Your Landscape

Is your lawn being overrun with thistle? Also known as Cirsium vulgare, thistle is an invasive plant that’s common throughout Texas as well as other Southern states.

It’s a relatively small plant, with the flowering stem reaching a height of just 1 to 1.5 meters. Like other invasive plants, though, it can quickly take over your landscape if not addressed.

By following these five tips, you can eliminate and prevent thistle in your landscape.

#1) Add Mulch

You can use mulch to prevent thistle from growing in your landscape.

Whether it’s organic or store-bought, mulch allows the soil to retain more moisture. At the same time, it will blanket the soil on which it’s applied to inhibit the growth of invasive plants, including thistle.

If you’re struggling with thistle in a flowerbed or next to a tree, try applying a layer of mulch.

#2) Reseed Bare Patches of Grass

Another way to gain the upper hand on thistle is to reseed bare patches of grass.

If one or more areas of your lawn is bare, thistle may emerge. By filling these bare patches with grass seed, you’ll encourage grass to grow there rather than thistle.

#3) Pull Up and Remove Thistle

Some homeowners assume that the best way to control thistle is to simply run it over with the lawnmower. While this may work temporarily, it’s not a viable long-term solution.

If you only mow thistle, you’ll inadvertently scatter the seeds across your lawn, which could make the problem even worse.

Therefore, you should consider pulling up and removing the entire thistle plant – taproot and all.

#4) Spot Treat With Vinegar

Vinegar is highly effective at killing thistle.

Its acidic properties can kill thistle on contact, making it an excellent solution for homeowners struggling with thistle. Simply fill a bottle with one part vinegar and one part water, after which you can spray it directly on thistle plants.

Just remember to use caution when applying vinegar so that you don’t accidentally hit your grass or other healthy plants.

#5) Go Easy on Fertilizer

Use caution to avoid over-fertilizing your lawn.

Fertilizing your lawn can balance the soil’s pH level while providing your grass with essential nutrients in the process. Unfortunately, it also encourages weeds like thistle to grow faster and taller.

You can still fertilize your lawn, but don’t do it too frequently. Once or twice a year should suffice for most lawns and landscapes.

The Woodsman Company offers tree planting, tree pruning and shrub trimming, tree removal and stump grinding as well as a tree wellness program.

If we can help with any of your tree care needs give us a call at 512-846-2535 or 512-940-0799 or

Request a Quote / Schedule an Appointment

The post 5 Easy Ways to Control Thistle in Your Landscape appeared first on Woodsman Tree Service.

The Truth About Tree Topping – Why It’s A Bad Idea

If your landscape is being overrun with tall, fast-growing trees, you may feel compelled to cut off the top.

Known as tree topping, it’s become a common solution for homeowners and business owners struggling to control their landscape.

While tree topping may sound effective, you should think twice before proceeding with it.

Tree Topping vs Pruning: What’s the Difference?

Upon reading the definition of tree topping, many people assume that tree topping is the same as pruning. After all, both tree topping and pruning involve cutting trees to remove some of their branches.

But tree topping goes one step further by cutting the entire tree – typically at the top – rather than just a few branches.

Increased Risk of Infection

Tree topping increases the risk of bacterial and fungal infections by creating large wounds.

When you topple a tree, the top of the trunk will become exposed to the surrounding environment. Cutting off the top of a tree, for example, leaves behind a barkless surface through which infection-causing bacteria or fungus can enter the tree.

Of course, this is just one of several reasons why tree topping is a bad idea.

Less Sunlight

Another reason tree toppling is a bad idea is because it restricts the amount of sunlight trees receive.

Like all plants, trees convert sunlight into energy via a process known as photosynthesis. When sunlight strikes a tree’s leaves, it will convert the sunlight into energy.

Unfortunately, tree topping significantly reduces or even eliminates the amount of leaves on a tree. And without a healthy canopy of leaves, the tree will struggle to produce a sufficient amount of energy via photosynthesis.

Weak Branches

It’s also worth mentioning that tree topping can lead to weak branches.

Trees respond to toppling by quickly growing new branches in an effort to attract more sunlight. Unfortunately, these newly developed branches are typically smaller and weaker than before.

As a result, the branches are more likely to fall during severe weather, which could create a safety hazard for you and your family.

It May Not Regrow

Even if you leave 10 or more feet of the tree’s trunk, it may not regrow after being toppled.

Tree toppling causes significant stress, and when combined with a bacterial or fungal infection, trees often struggle to regrow after being cut from the top.

If you want to keep a tree in your landscape, consider pruning it rather than toppling it.

The Woodsman Company offers tree planting, tree pruning and shrub trimming, tree removal and stump grinding as well as a tree wellness program.

If we can help with any of your tree care needs give us a call at 512-846-2535 or 512-940-0799 or

Request a Quote / Schedule an Appointment

The post The Truth About Tree Topping – Why It’s A Bad Idea appeared first on Woodsman Tree Service.

5 Fertilizing Tips to Protect Against Lawn Burn

Fertilizing your lawn on a regular basis – once or twice a year for most lawn grasses – will provide it with essential nutrients like nitrogen, phosphorus and potassium, all of which are needed for healthy grass.

It’s not uncommon, however, for fertilizer to have a negative impact on lawns. Certain types of fertilizer can dry out your lawn, a condition known as lawn burn.

You can still apply fertilizer to your lawn, but you should follow these tips to protect it against lawn burn.

#1) Avoid High-Nitrogen Fertilizers

Don’t use a fertilizer with a high ratio of nitrogen to phosphorus or potassium. Nearly all fertilizers are made of these three main ingredients.

Fertilizers with a high concentration of nitrogen, however, are more likely to cause lawn burn than their counterparts.

As the excess nitrogen soaks into the soil, it leaches moisture from the grass.

#2) Use Less Fertilizer

Another tip to protect against lawn burn is to use less fertilizer. A good rule of thumb is to use no more than 1 pound of nitrogen per 1,000 square feet.

Of course, you’ll have to factor the nitrogen content of your fertilizer to determine exactly how much you should use. If your fertilizer has 20% nitrogen, for example, you should generally use about 5 pounds per 1,000 square feet of grass.

#3) Close the Spreader Hopper When Refilling

When using a spreader hopper to fertilize your lawn, make sure it’s closed when you refill it.

You’ll probably need to stop every 10 to 15 minutes to refill the spreader with additional fertilizer.

If the spreader hopper is open, excess fertilizer will spill out. And if you don’t clean it up, it may dry out your lawn, eventually leading to lawn burn.

#4) Water Your Lawn Regularly

Of course, watering your lawn regularly can help protect it from lawn burn.

During the summer, most lawn grasses need about 1 to 2 inches of water per week. If your lawn gets less water during the summer, it will be dehydrated.

Therefore, fertilizing it will only dry it out even further.

#5) Don’t Fertilize If Diseased or Stressed

If your lawn is diseased or stressed, don’t fertilize it.

Stressed lawns are more likely to suffer from fertilizer burn than healthy, unstressed lawns.

Rather than fertilizing your lawn when it’s stressed, identify the underlying cause of the stress and resolve it. Once your lawn has emerged from its stressed state, you can then fertilize it without harming it.

The Woodsman Company offers tree planting, tree pruning and shrub trimming, tree removal and stump grinding as well as a tree wellness program.

If we can help with any of your tree care needs give us a call at 512-846-2535 or 512-940-0799 or

Request a Quote / Schedule an Appointment

The post 5 Fertilizing Tips to Protect Against Lawn Burn appeared first on Woodsman Tree Service.

This website nor its owners are an actual service provider, this website is a referral service. When you place a phone call from this website, it will route you to a licensed, professional service provider that serves your area. For more information refer to our terms of service.

© TreeRemovalandTrimming.com

(877) 959-3534