Your Memphis Emergency Tree Care Experts
Many parts of Memphis boast old-growth tree-lined streets that add a touch of wonder to our day to day lives. They provide shade, cleaner air, and sense that life is bigger than our problems. But the very thing that makes them special means they pose a greater potential danger to people and property in the event of a storm or other emergency. When a storm hits in Memphis, the first concern for many people is whether their trees will make it through. And if they don’t, where will they land? Thankfully, in the event of an emergency, you have a team you can trust to help clean up and minimize damage. Red’s Tree Service are tree service professionals serving Memphis, Collierville, and the Mid-South. We specialize in everything related to trees, such as tree trimming, tree removal, stump grinding, and emergency tree care services.
When Do I Need Emergency Tree Care?
If you’re wondering what kind of situation requires Memphis emergency tree care, and a good rule of thumb is to call us if there is a risk of property damage or personal harm. This might include:
Fallen or damaged tree limbs:
If you notice damaged limbs in your trees, you need to contact an experienced tree service to avoid any future damage or injury. A broken branch, even one that’s still high in a tree, poses a significant and unpredictable threat. You know it will fall, but you don’t know when, or what will be under it when it does. And trying to remove it yourself without the proper equipment and experience can be just a dangerous. Red’s Tree Service can safely remove the limb before anyone or anything gets hurt.
If limbs or even trees have already fallen onto your property, you’ll need professional help to limit any further damage. A limb that falls on your open lawn may seem easy enough to deal with, but what about a tree that falls dangerously close to a power line, or even on your roof? In these types of situations, any risk is too big, and you can’t be too careful.
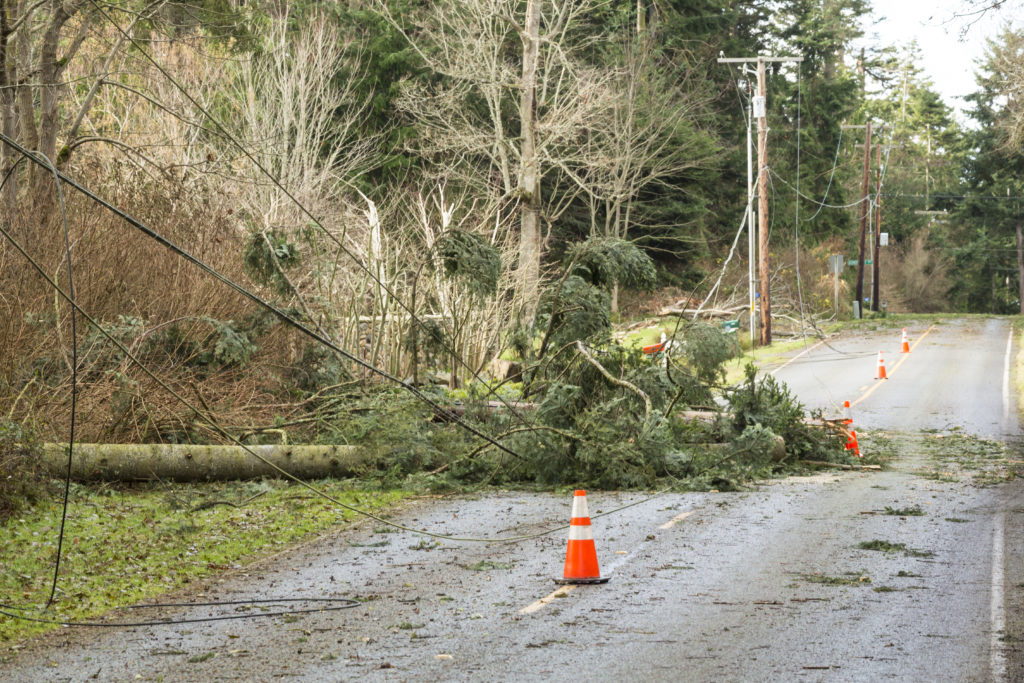
Storm Damage:
Memphis natives know to expect a few big storms every year. You also know what this can mean for your trees. We live in a wet and windy climate, so trees are always at risk. Strong storms can also gradually weaken older trees or cause the soil around the root system to erode. A tree that was strong enough to survive the last storm may not be so lucky during the next one. It’s a good idea to have a professional like Red’s Tree Service in Memphis inspect your property for any potential weak spots after a storm, whether or not there is any damage that needs to be handled immediately.
Sick Trees:
A sick tree left to get worse can cause serious damage to all the trees on your property. Tree diseases can cause weakness, instability or cause the tree to rot and die. If you notice brittle or peeling bark, uneven, foliage, yellowing leaves, dead branches, carpenter ants, fungus and roots that are brittle or knotty, consider it an emergency and call Red’s Tree Service.
Emergency Tree Services We Offer
No matter what your tree emergency is, The team at Red’s Tree Service can help you avoid injury and damage while maintaining a beautiful tree-filled landscaping.
Emergency tree service, including storm damage clean-up
When storms can cause large limbs to fall on your home and ice has been known to take down whole trees, we’re here to help with our emergency tree service! Our expert team is well versed in minimizing damage at every level as we carefully and expertly remove limbs and trees. Our emergency tree service often combines tree removal and tree pruning. We offer dynamic cabling to support weakened trees, as well.
Cleaning up damage caused by storms can be dangerous if you attempt it on your own. We have the tools and experience necessary to cut down and remove fallen tree branches safely. We can handle any size project and will do our best to make sure that there is the least amount of damage to your trees possible.
Dynamic Cabling
This process uses steel cables to hold the branches of the tree together by connecting places that have been weakened or started to fall, and preventing them from falling further. It was developed to be much healthier for the tree. The cables are non-invasive and move with the tree. This service allows you to keep the beauty of your old trees without having to worry that they will fall and cause damage to your house, business, or other property.
Tree risk assessment and preventive care
Not only do we work to correct the damage caused by emergency situations, but we help take steps to prevent damage in an emergency. A tree health and risk assessment by Red’s Tree Service can help you spot any weaknesses before they become major problems. This saves you time and money. Understanding and addressing the risks associated with your trees is important, but keep in mind that evaluating the seriousness of each of these defects is a job best left to professional arborists like us. Regular tree inspections that are combined with preventive care such as trimming, pruning, and fertilizing will result in trees and shrubs that look great and have the best chance for a long, healthy life.
Contact your Memphis tree service experts for a free quote
To learn more about the many tree services we offer or to schedule an appointment for a free quote, click here. You can also call or text us at 901.424.4548, and our email address is [email protected].
This post first appeared on https://redstreeservice.com